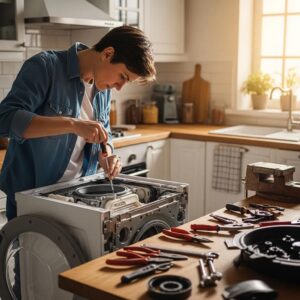

Whirlpool washers start the wash cycle by filling with water.
Nothing happens when the water does not flow and the problem can be one of several things. First, a quick explanation of why we care about the water level switch when the washer is not filling and then I will detail the basic steps I use to troubleshoot any washer that will not fill.
The function of a water level switch on a Whirlpool washer.
The water level switch controls the power going to the water inlet valve. Electrical power is routed from the timer through the water level switch to the water inlet valve. When the correct water level is reached in the tub, the water level switch will remove power from the water inlet valve and direct it to the motor. This action ends the fill cycle and begins the agitation phase. Specific models may have more components in the circuit, but this is the basic operation.
Troubleshooting steps I use to identify the problem.
These steps apply to the most common washers. Upscale models may have additional components in the circuit (such as thermistors and water valves with more than two solenoids), but these basic steps can serve as a starting point.
- Select different water temperatures.
- A. If the water flows on one temperature selection and not another.
- Disconnect the water hoses at the machine and test by running water through each hose into the drain.
- Inspect the sediment screens in the inlet of the water valve and clean any sediment that is blocking the flow.
- If suspected flow problem is corrected, reconnect hoses and go back to step 1, otherwise, go to step 3 “Test the Whirlpool washer inlet valve” (skip step 2).
- B. If there no water flow on any selection go to step 2 below picture.

- A. If the water flows on one temperature selection and not another.
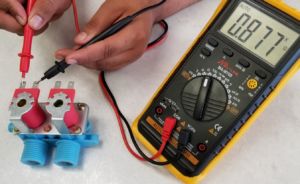
- Remove and test the Whirlpool washer water level switch (picture above) also known as a pressure switch. Use a multi-meter to test for continuity (connection) between the terminals. Alternatively, the pressure switch can be taken to the nearest U-FIX-IT store for free testing.
- A. Two of the three terminals should show continuity between them.
- B. Blow gently on the hose connection of the pressure switch until you hear a click.
- The two terminals that were showing continuity should now show open until the pressure is released.
- The common terminal should now show continuity to the third terminal until the pressure is released.
- Water level switch is bad if it fails to test as described in the previous two steps, otherwise, go to step 3.

- Test the Whirlpool washer water inlet valve or remove the water valve and take it to the nearest U-FIX-IT store for free testing.
- A. Set the water temperature to warm.
- B. Using a multimeter check that there is 110 volts present at one of the solenoid coils on the water valve.
- If 110 volts is present at the coil and no water is flowing through the valve then water valve is bad.
- If 110 volts is not present at any solenoid then use the schematic wiring diagram to work back through the circuit until the lost voltage is found.
If these steps for identifying the common Whirlpool washer fill problems do not isolate the problem, locate the wiring diagram for your washer and call the nearest U-FIX-IT store for personalized help in locating the problem.