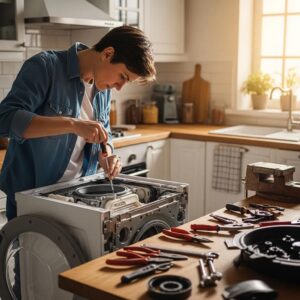
BACK  At U-FIX-IT, we believe that understanding your appliance is the first step to a successful repair. A complete dryer parts diagramis an indispensable tool for any homeowner or technician looking to tackle DIY dryer repair. It empowers you to quickly pinpoint the exact replacement dryer partsyou need, eliminating guesswork and saving you time and money. Dryers, whether gas or electric, are essential household appliances, and when they fail, it can disrupt your routine. This comprehensive guide will walk you through identifying key dryer components, how to effectively read a dryer parts diagram, common dryer parts to replace, the crucial differences between gas and electric models, and practical dryer troubleshooting tips. Our goal is to equip you with the knowledge to confidently diagnose and fix your dryer, ensuring you get the right appliance partsevery time.
Essential Internal Dryer Componentsfor Efficient Operation

Dryer
Complete Dryer Parts Diagram: Your Guide to DIY Dryer Repair
 At U-FIX-IT, we believe that understanding your appliance is the first step to a successful repair. A complete dryer parts diagramis an indispensable tool for any homeowner or technician looking to tackle DIY dryer repair. It empowers you to quickly pinpoint the exact replacement dryer partsyou need, eliminating guesswork and saving you time and money. Dryers, whether gas or electric, are essential household appliances, and when they fail, it can disrupt your routine. This comprehensive guide will walk you through identifying key dryer components, how to effectively read a dryer parts diagram, common dryer parts to replace, the crucial differences between gas and electric models, and practical dryer troubleshooting tips. Our goal is to equip you with the knowledge to confidently diagnose and fix your dryer, ensuring you get the right appliance partsevery time.
Your Dryer Repair Journey Starts Here!
At U-FIX-IT, our mission is to provide you with the help you need to get your appliance back in running order, even if it means we do not make a sale. We are your trusted partner for all appliance parts questions, offering expert guidance and the exact replacement parts you need.
Ready to Fix It Yourself? U-FIX-IT is Your Go-To for Dryer Parts & Expert Guidance
Don’t let a broken dryer disrupt your routine. With the right dryer parts diagramand the correct replacement dryer part, you can tackle many common repairs yourself. U-FIX-IT stands as the industry’s go-to resource for appliance parts questions, offering not just parts, but the knowledge and support to empower your DIY efforts. Find the exact dryer componentyou need and get your dryer running like new!
Understanding Your Dryer: Main Components & Their Functions
Dryers are complex machines made from a handful of critical parts, and each one plays a specific role in the drying cycle. Understanding these dryer componentsis the first step to reliable troubleshooting and successful dryer repair.
Essential Internal Dryer Componentsfor Efficient Operation

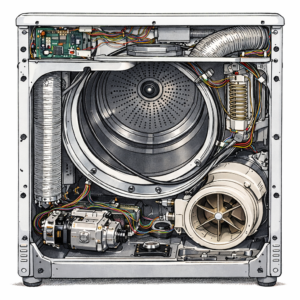
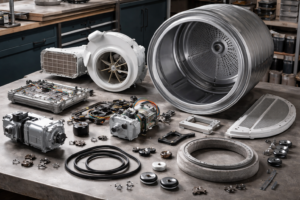
Inside most dryers, you’ll find the core internal components that make the magic happen. These include the heating element(or burner assembly on gas models), which generates the necessary heat; the large rotating drum, where clothes tumble; and the powerful motor, which drives both the drumand the blower wheel. A sophisticated control board or timerdirects cycles, temperature settings, and overall operation. For safety and regulation, the thermostatmaintains optimal temperatures, while the thermal fuseacts as a critical safety device, cutting power if the dryer overheats. The drive beltlinks the motor to the drum, often kept taut by idler pulleys. The blower wheelis crucial for moving hot air through the drumand expelling moist air. The lintfiltertraps fibers, protecting airflowand significantly reducing fire risk. Finally, the exhaust ventroutes moist air outside, completing the drying cycle. All these essential internal dryer componentsare available as high-quality replacement partsat U-FIX-IT to keep your dryer running efficiently and safely.
External Dryer Parts: Interaction, Connection & Stability
The exterior parts of your dryer are how you interact with the machineand how it connects to your home’s utilities. The control panel(featuring knobs, buttons, or a touchscreen) allows you to select cycles and temperature settings. The sturdy door and its latchseal the drum, often including a window to view your laundry. The power cordprovides the necessary electrical supply, while the exhaust hoseconnects the dryer to an outside vent to expel moisture. Finally, adjustable leveling legskeep the unit steady, reducing vibration and noiseduring operation. Knowing both inside and outside dryer partsmakes complete maintenanceand dryer repaireasier, and U-FIX-IT offers readily available replacement partsfor all these components, ensuring a perfect fit for your specific model.
Mastering Your Dryer Parts Diagram: A Step-by-Step Troubleshooting Guide
A dryer parts diagramis one of the most powerful tools for successful DIY dryer repair. It provides a visual roadmap, showing where each part sits within the appliance, often accompanied by specific part numbers for accurate ordering. To effectively use your diagram:
- Locate Your Model Number:This is the crucial first step. Your dryer’s model number is typically found on a sticker inside the door, on the back panel, or sometimes on the front kick plate.
- Find the Matching Diagram:Once you have your model number, consult your dryer’s owner’s manual or search online at U-FIX-IT’s extensive database for the exact dryer parts diagramspecific to your model.
- Identify the Faulty Component:Compare the diagram to your actual dryer. If, for example, the drumwon’t spin, the diagram will clearly show you the locations of the drive beltand idler pulley, guiding your inspection.
- Note Part Numbers:Many diagrams include specific part numbers. Jot these down to ensure you order the precise replacement dryer part.
Always review the dryer parts diagramthoroughly before taking anything apart to understand the assembly and avoid damaging nearby components. This systematic approach, combined with U-FIX-IT’s comprehensive resources, ensures you can easily order the exact replacement partyou need with confidence.
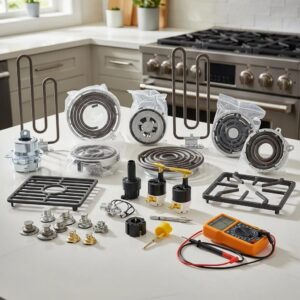
Common Dryer Parts to Replace: Identification, Repair & U-FIX-IT Solutions
Some dryer partsexperience more wear and tearthan others, making them common culprits for dryer malfunctions and frequent DIY dryer fixes. U-FIX-IT provides all the necessary replacement dryer partsfor these common issues:
- Heating Elements:If your electric dryer produces no heat, a burnt-out heating elementis often the cause. Replacement typically involves cutting power, accessing the element housing, and installing a new unit.
- Drive Belts:A snapped or stretched drive beltwill prevent the drumfrom turning. Replacing a beltusually requires opening the top and front panels, releasing tension from the idler pulley, and carefully routing the new beltaround the drumand motor pulley.
- LintFilters:Clogged or broken lintfiltersrestrict airflow, leading to longer drying times and potential fire hazards. They are usually easy to remove, clean, or replace.
- Thermal Fuses:These are single-use safety devices that blow when temperatures get too high, often due to clogged vents. Replacing the thermal fuseis straightforward, but it’s crucial to identify and fix the underlying cause of overheating first.
- DrumRollers or Bearings:Worn drumrollersor bearings cause loud squealing noises or prevent the drumfrom rotating smoothly. Changing them requires disassembling the drumand fitting new rollers or bearings.
Always unplug the dryer from its power source before attempting any repair. Find all these common replacement dryer parts and more at U-FIX-IT to complete your DIY fix with confidence and get your dryer back to optimal performance!
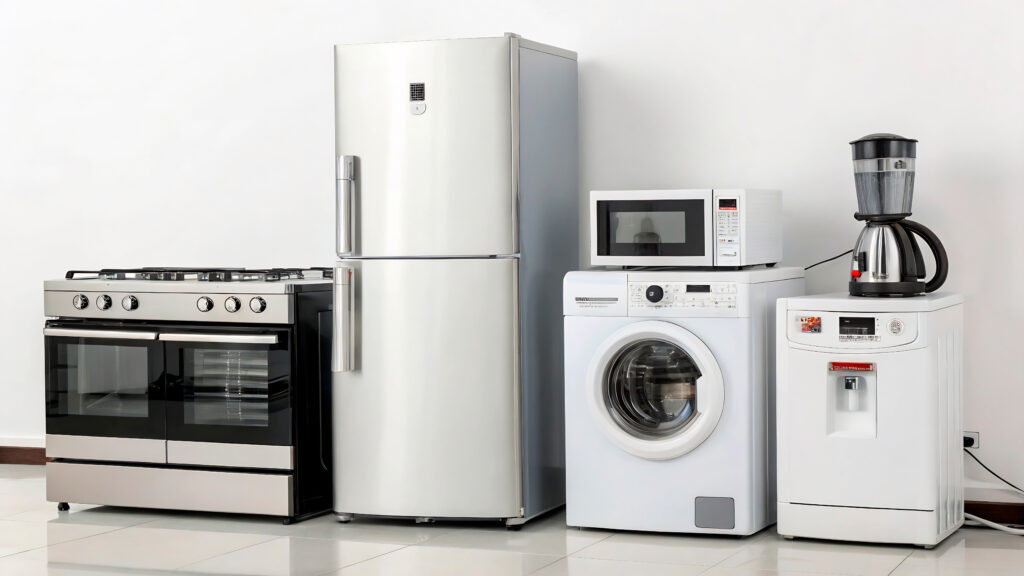
Gas vs. Electric Dryer Parts: Key Differences & Safety Considerations
While many dryer partsare shared between gas and electric models, their heatgeneration systems differ significantly, impacting diagnosis and repair. Understanding these distinctions is vital for ordering the correct dryer componentsand ensuring safety.
- Electric Dryers:These models utilize a heating element, typically a coiled wire, to generate heat. They require a dedicated 240-volt electrical outlet. Troubleshooting “no heat” issues often involves checking the heating element, thermal fuse, and thermostats.
- Gas Dryers:Gas dryers use a burner assembly, which includes an igniter, flame sensor, and gas valve, to create heatfrom natural gas or propane. These models require a gas line connection and a standard 120-volt electrical outlet for controls and motor. Diagnosing heating problems in gas dryers focuses on the igniter, flame sensor, and gas valve.
Gas models also include specific gas linesand a gas valve, which demand careful handling. For any work involving gas lines or major electrical components, U-FIX-IT always recommends consulting a certified appliance repair professional to ensure safety and compliance. Knowing these differences helps you pick the right dryer partsand follow the correct safety steps when ordering your specific gas or electric dryer componentsfrom U-FIX-IT.
Troubleshooting Common Dryer Problems: Diagnose & Repair with Confidence
Empowering yourself with basic troubleshooting knowledge can save you time and money. Here are common dryer problems and how to approach them:
- No Heat:For electric dryers, check the thermal fuseand heating element. For gas dryers, inspect the igniter, flame sensor, and gas valve.
- DrumNot Turning:This often points to a broken or stretched drive belt, a faulty motor, or issues with the idler pulley.
- Loud Noises:Unusual noises usually indicate worn drumrollers, a failing idler pulley, or debris caught in the blower wheel.
- Clothes Stay Damp:Slow drying is frequently caused by a clogged lintscreen, a blocked exhaust vent, or a failing heating system.
Always refer to your dryer’s manual and a detailed dryer parts diagramfor step-by-step checks and safety guidance. U-FIX-IT provides access to these resources and the exact replacement partsrequired for your fix, helping you diagnose and repair with confidence.
With basic troubleshooting and regular care, such as emptying the lintfilter after every load and cleaning the exhaust vent periodically, many dryer issues are easy to prevent or fix without a technician. For complex problems or anything involving gas lines or major electrical work, U-FIX-IT strongly advises calling a certified appliance repair professional to stay safe and ensure the job is done right. For everything else, we have the “u fix it” appliance partsyou need to get your dryer back in top condition, supported by our commitment to your success, even if it means we don’t make a sale. Trust U-FIX-IT as your ultimate resource for all your dryer partsand repair needs.